From our Blog

Inspirations, Thoughts, Shares

Summer workshops

Screen Shot 2016-06-06 at 4.25.46 PM
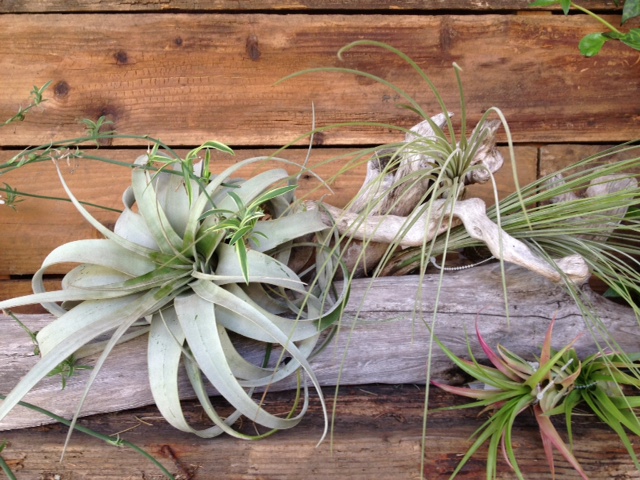
Our Summer workshop schedule is beginning June 17th with “Bonsai for beginners” or “how not to kill your bonsai”. Local legend Larry Shapiro will lead us through the basics of bonsai care and probably have a few off color jokes for us as well. This free class will be held at thicket June 17th from 6 to 7PM. Please register through thicket as seating is limited.


Stay tuned for more summer workshops at thicket!

SLUGS!

Slugs – We all got em! Now what do we do with them.

Slugs are sort of amazing really, some feed mostly of leaf litter or rotting material and work to keep an ecosystem tidy and free of too much bacteria that might build up in decomposing matter. Unfortunately in our urban gardens there are very few natural predators to keep slug populations in check. While a few slugs will do a bit of damage too many slugs can devastate our veggie gardens and perennials.

If slugs are becoming a problem in your garden here are a few tips to keep them under control.

Hand pick them – I once told this to a man seeking advise and he looked at me like I was insane “with your hands?” he said turning green with disgust. But Northwest gardeners are a hardy bunch and if that is what it takes to protect your lettuce you can find the courage to do it. My grandmother Lucille gives this advise –  “Slugs love to hide under the rain downspouts, under rocks, between bricks or even the underside of large leaves” She also looks for them “near their favorite foods like hostas or salomons seal”. Slugs are nocturnal so the best time to find them is in the evening. Slugs prefer moist areas which is another reason to water the garden in the morning instead of the evening. Evening watering is like creating the perfect environment for them to come out and feed.

Dispose of the them – you can put them in a jar and release them “into the wild” far from your garden if you are feeling generous but most people just plop them in saltwater or squish them, I often put them in the yard debris bin and wish them luck. Some people feed them to their chickens as a treat.

Bait them – If you are having a hard time finding them in the first place you can lure them into a trap by placing something enticing out for them to find and then collecting them up. Try a half citrus peel in the garden and the next morning they will be lurking underneath so you can collect them. They are also drawn to food scraps

Trap them – You can also use traps filled with beer or cornmeal. You can purchase little traps or cut a hole in a used yogurt container. Leave enough room at the bottom to fill with the bait and cover the top with the lid to keep rain from diluting, plus with a lid you don’t need to see the resulting slug slurry. Dispose in the compost.

Natural predators – Nematodes can be purchased in little packets and watered into the surface of the soil. These parasites attack the slugs and can be effective but keep in mind that slugs are a part of the garden system. I have heard stories of people wiping out slug populations only to find them rebound with destructive force.

Poison – This is a last resort please use caution as some poisons will linger in the slug and can harm birds that feed on them. Please read the labels carefully and use caution where wild animals or pets are present.

Precaution – look for slug eggs and dispose of them. Slug eggs are a gooey little cluster of round white balls, they can be found just under the surface of the soil, stuck under leaf litter or protected under rocks, bricks or decks.

One last tip – vinegar will to help remove the slime from your hands and tools – yuck!

Veggie Sale!

Screen Shot 2016-05-27 at 1.11.39 PM

We love a Summer garden Party and now is the time to get those veggies in the ground for Summer Harvest

This weekend all veggie starts and seeds are 30% off!

We have lots of gallon tomatoes, peppers and eggplants as well as corn, squash and beans. If your are feeling like growing something unusual try goji berries, lemongrass or even native huckleberry. We have so many varieties of vegetables, fruit and edible flowers at thicket. Come visit us today!

Native plant sale

Screen Shot 2016-05-20 at 11.53.07 AMNative plants are better suited to our soil and climate conditions and so as a rule are much easier to grow than traditional landscaping plants. These important plant species also provide pollen, seeds and nectar that attract and nourish native birds, bees and butterflies. Natives also require much less fertilizers and water. A native landscape promotes biodiversity and natural stewardship, but most importantly it is beautiful!

Come visit thicket and see all the new lovely native plants on sale this weekend.

There are so so many options for great northwest natives to grow here in Portland.
Some of our favorite natives for NW gardens

Natives that we love:

Acer circinatum Vine Maple
Amelanchier alnifolia Western Serviceberry
Berberis nervosa Dull Oregon Grape
Cornus sericea ssp. sericea stolonifera) Red–osier Dogwood
Corylus cornuta Hazelnut
Gaultheria shallon Salal
Holodiscus discolor Ocean–spray
Oemleria cerasiformis Indian Plum
Physocarpus capitatus Pacific Ninebark
Ribes sanguineum Red Currant
Rubus parviflorus Thimbleberry
Rubus spectabilis Salmonberry
Sambucus racemosa Red Elderberry
Symphoricarpos albus Common Snowberry
Vaccinium parvifolium Red Huckleberry
Berberis aquifolium Tall Oregon Grape
Euonymus occidentalis Western Wahoo
Lonicera hispidula Hairy Honeysuckle
Lonicera involucrata Black Twinberry
Malus fusca  Western Crabapple
Philadelphus lewisii Mockorange
Prunus virginiana Common Chokecherry
Ribes viscosissimum Sticky Currant
Rosa gymnocarpa Baldhip Rose
Rosa nutkana var. nutkana Nootka Rose
Rosa pisocarpa Swamp Rose
Rubus ursinus var. macropetalus Dewberry
Salix sitchensis Sitka Willow
Sambucus cerulea Blue Elderberry
Symphoricarpos mollis Creeping Snowberry
Viburnum ellipticum Oval–leaved Viburnum
Ceanothus sanguine us Oregon Tea–tree
Ceanothus velutinus var. laevigatus Mountain Balm
Ribes bracteosum Blue Currant
Ribes divaricatum Straggly Gooseberry
Ribes lobbii Pioneer Gooseberry
Rubus leucodermus Blackcap Raspberry
Vaccinium ovatum Evergreen Huckleberry

Achlys triphylla  Vanillaleaf
Adiantum aleuticum Northern Maidenhair Fern
Asarum caudatum Wild Ginger
Athyrium filix–femina Lady Fern
Carex deweyana ssp. leptopoda Dewey’s Sedge
Dicentra formosa Pacific Bleedingheart
Elymus glaucus Blue Wildrye
Elymus glaucus ssp. jepsonii Jepson’s Blue Wildrye
Galium aparine Cleavers
Hydrophyllum tenuipes Pacific Waterleaf
Linnaea borealis Twin flower
Moutia perfoliata Miner’s Lettuce
Montia sibirica Candy Flower
Oxalis oregana Oregon Oxalis
Petasites frigidus var. palmatus Palmate Coltsfoot
Polypodium glycyrrhiza Licorice Fern
Polystichum munitum Sword Fern
Prosartes hookeri Hooker’s Fair ybells
Prosartes smithii Smith’s Fair ybells
Pteridium aquilinum Bracken Fern
Smilacina racemosa Western False Solomon’s Seal
Smilacina stellata Starry False Solomon’s Seal
Streptopus amplexifolius Clasping Twisted–stalk
Tellima grandiflora Fringecup
Tiarella trifoliata v. unifoliata Trefoil Tiarella
Tolmiea menziesii Pig–a–back
Trillium ovatum Western Trillium
Vancouveria hexandra White Inside–out Flower
Viola glabella Stream Violet
Actaea rubra Baneberry
Adenocaulon bicolor Pathfinder
Agoseris grandiflora Large–flowered Agoseris
Anemone deltoid Western White Anemone
Apocynum androsaemifolium Spreading Dogbane
Aquilegia formosa Red Columbine
Aruncus sylvester  Goatsbeard
Aster modest us Few–flowered Aster
Aster subspicatus Douglas’s Aster
Blechnum spicant Deer Fern
Bromus carinatus California Brome–grass
Campanula scowler Scouler’s Bellflower
Cardamine angulata Angled Bittercress
Carex amplifolia Big–leaf Sedge
Carex hendersonii Henderson’s Wood Sedge
Cinna latifolia Woodreed
Circaea alpina Enchanters Nightshade
Coptis laciniata Cutleaf Goldthread
Cornus canadensis Bunchberry
Corydalis scouleri Western Corydalis
Dicentra formosa Pacific Bleedingheart
Disporum hookeri Hooker Fairy–bell
Disporum smithii Large–flowered Fairy–bell
Dryopteris arguta Wood Fern
Dryopteris expansa Spreading Wood Fern
Stachys cooleyea Cooley’s Hedge-nettle
Thalictrum occidentale Western Meadowrue
Tiarella trifoliata Laceflower
Trientalis latifolia Western Starflower
Urtica dioica Stinging Nettle
Vicia gigantea Giant Vetch
Anemone lyallii Small Wind–flower
Anemone oregana var. felix  Oregon Anemone
Boykinia occidentalis  Slender Boykinia
Calypso bulbosa Fairy Slipper
Cynoglossum grande Pacific Hound’s–tongue
Cypripedium montanum  Mountain Lady–slipper
Cystopteris fragilis Brittle Bladder Fern
Dicentra formosa ssp. oregana Oregon Bleeding Heart
Erythronium oregonum  Giant Fawn–lily
Goodyera oblongifolia Giant Rattlesnake–plantain
Gymnocarpium dryopteris Oak Fern
Lonicera ciliosa Trumpet Vin e
Nothochelone nemorosa Turtle Head
Sanicula crassicaulis Pacific Sanicle
Synthyris reniformis Snow Queen
Trillium chloropetalum Giant Trillium
Viola hallii Hall’s Violet
Viola sempervirens
Epilobium angustifolium Fireweed
Festuca occidentalis Western Fescue–grass
Festuca subulata Bearded Fescue–grass
Fragaria vesca var. bracteata Wood Strawberry
Galium triflorum Sweetscented Bedstraw
Geum macrophyllum Oregon Avens
Heuchera micrantha  Smallflowered Alumroot
Hieracium albiflorum White–flowered Hawkweed
Iris tenax Oregon Iris
Ligusticum apiifolium Parsley–leaved Lovage
Ligusticum grayii Gray’s Lovage
Lilium columbianum Columbia Lily
Heracleum lanatum Cow–parsnip
Lupinus latifolius Broadleaf Lupine
Luzula campestris var. congesta Field Woodrush
Luzula parviflora Small–flowered Woodrush
Lysichitum americanum Skunk Cabbage
Maianthemum dilatatum False Lily–of–the–valley
Mertensia platyphylla Western Bluebells
Mitella caulescens Leafy Mitrewort
Mitella pentandra Five–stamened Mitrewort
Monotropa uniflora Indian-pipe
Montia parvifolia Streambank Springbeauty
Nemophila menziesii Baby Blue–eyes
Oplopanax horridus Devil’s Club
Osmorhiza chilensis Mountain Sweet–root
Poa compressa Canada Bluegrass
Potentilla glandulosa Sticky Cinquefoil
Prunella vulgaris var. lanceolata Heal–all
Pyrola asarifolia Wintergreen
Satureja douglasii Yerba Buena
Scirpus microcarpus Small–fruited Bullrush

Chickens in the garden

IMG_5061

Chickens are a great addition to a garden but they pose some very real problems as well. If you currently have chickens you know that they can devour an astonishing amount of plants and can be very destructive in the garden digging and scratching for grubs and worms.

I’ve been advocating to growers to add a chicken safe symbol to plant tags similar to the one for deer but until that dream comes to fruition we have been compiling lists of plants that can both withstand the ravages of our tiny backyard dinosaurs as well as the ones that should be avoided as they can be toxic to our feathered friends.

People frequently ask us about poisonous plants that might affect their chickens and while there are many many common poisonous plants out there for both humans and chickens it is important to remember that there are relatively few cases of poisoned chickens in Portland. Some gardeners have reported to us that the supposed toxic plants are the ones that chickens avoid in the garden and so make ideal additions.

An important detail to consider is that a confined chicken with fewer sources of forage will be more likely to nibble toxic plants where a free range chicken with many options would be more likely to avoid the bad ones. Chickens also seem to have individual preferences so where one might like to eat the roses the next turns her beak up and won’t eat them.

Chickens will also sometimes destroy plants while searching for bugs. It looks as if they were eating the plants but they were really just eating aphids and insects on the undersides of leaves and rooting around in the soil for grubs.

No one knows your chickens like you do, careful observation of chicken habits is the best way to make for a heathy flock and a thriving garden.

Common plants toxic to chickens

Amanita mushrooms
Asclepsias
Castor Bean
Death Camas (this one is sort of a no brainer)
Jimsonweed
Pokeweed
Milkweed
Monkshood
Mother of Millions
Oleander
Poppies (Mexican especially)
Tobacco

Plants that are resistant to Chickens
(note some of these plants are on some toxic lists as well)

Herbs
Catmint
Chives
Lemon balm
Margoram
Mint
Oregano
Rosemary
Sage

Perennials
Agapanthus
Alchemelia
Anemone
Calla lily
Columbine
Crocosmia
Daylily
Daffodil
Echinacea
Feverfew
Fritillaria
Fuchsia
Geum
Goldenrod
Geranium
Hellebore
Iris
Monarda
Muscari
Phlox
Peony
Russian sage
Rudbekia
Sedum
Shasta daisy
Yarrow

Groundcovers
Epimedium
Carex
Cotonaster
Juniper
Korean rasberry
Lambs ear
Liriope
Plumbago
Sedum
St Johns wort
Sweet woodruff

Shrubs
Azelea
Barberry
Ceanothus
Choisya
Euonymus
Fatsia
Forsythia
Hebes
Honeysuckle (sometimes listed as toxic)
Hydrangea (sometimes listed as toxic)
Lavender
Lilac
Mahonia
Nandina
Osmanthus
Pine
Pittosporum
Rose (we have heard of chickens ravaging these)
Santolina
Salal
Spirea
Spurge
Viburnum
Weigela

Edible flowers

IMG_5187

Edible flowers add so much to a dish – color and texture as well as flavor. Use them simply as a garnish, or infuse into vinegars & liquors for the most flavor. Sprinkle them onto soups or casseroles, pastries and dips, bake them into the tops of breads, muffins or cakes and you can even freeze them into ice cubes for summer cocktails.

Flowers are ephemeral and are generally best when harvested in the cool morning hours after a good watering. Only organically grown flowers that you have identified without a doubt should be eaten.

Here are some of our favorite varieties:

Basil flowers are a bit bitter but still edible in the right dish and the colors are gorgeous.

Borage blossoms taste a bit like a cucumber and are a lovely addition to salads or pastries, they are gorgeous in summer cocktails and are a traditional addition to a pimms cup.

Bee balm flowers are wonderful in teas or as a spicier alternative to oregano.

Bergamot, if you are lucky to have some citrus blooming in your house you may not want to pick any but if you have plethora of blooms use them to infuse vinegars, sauces or liquors.

Carnations – there are many varieties all with their own characteristics but most have a subtle clove like scent.

Chives as well as any alliums can add a bit of zing to salads or any dish that need a bit of heat. Make a chive emulsion with lemon dijon and oil that will brighten many dishes.

Chamomile flowers are cute as a button, decorate cupcakes, toss into salads or teas or just pop in your mouth while you are weeding.

Cilantro blooms taste similar to the leaves with a bit of spice but their flavor dosn’t hold up to cooking so eat them fresh in salsas salads and cocktails. Pineapple cilantro sorbet really close to perfection.

Chicory is mild.

Cornflower or bachelor buttons have a slight clove taste, most commonly used as a garnish they can also be used as a food coloring with a beautiful blue hue.

Chervil flowers have more flavor then their mild leaves and are reminiscent of anise. I love cream of chervil soup with the flowers as a lovely accent.

Calendula or marigold can be used as a saffron substitute, it lacks the taste with more of a citrus tang but will add a lovely golden color to rice dishes. Their bright yellows and oranges are beautiful additions to a festive meal.

Clover flowers are profuse and lovely in salads jellies and wines.

Chysanthemum come in many shapes and sizes, their flavor ranges from dull to peppery but they always add a bit of color. They are often used in stir-fries.

Dill flowers are just as flavorful as the leaf maybe even more so, and are great with seafood or cheddar dill biscuits.

Daylilyies taste like a sweet melon. It is a mild flavor but it’s there. Try them stuffed with a soft cheese and fried. DO NOT eat other kinds of lilies as many are toxic.

Fennel has a sharp anise flavor, sprinkle them on salads, use in tea or dry them and serve in a little bowl as an after dinner mint.

Hibiscus flowers will make any meal seem extraordinary.

Lemon verbena blooms are wonderful in teas or desserts that need a little citrus scent. Make an infused oil for use later in the season.

Lavender aroma is strong so add it sparingly. Try it as a substitute for rosemary for a similar taste with more floral notes. It’s divine in a citrus based sorbet. Make a simple syrup for use in drinks, one of our favorites is mezcal with grapefruit, lavender syrup and a salt rim – yum!

Lilac is one of the sweetest tasting garden flowers. I like to dry them and place a few sprigs in my sugar pot to insure it with that intoxicating aroma, it’s lovely in a mild tea or cream cheese frosting.

Mint blossoms can be used just as the herb and just about anywhere. I love it in salsas, in a cucumber yogurt sauce, on green beans with feta, in chocolate chip cookies and in omelets with peas and a good hard cheese.

Marjoram blooms are similar in taste to thyme and are mild enough to use anyplace you want to add their subtle color.

Nasturshims are a peppery hot surprise given their delicate looking blooms. They are wonderful on salads or as garnish but adding them to a soft creamy cheese really brings out their flavor. You can also pickle the seeds for a spicy caper substitute.

Okra flowers are beautiful additions to lots of savory or sweet dishes. Use them to garnish masala or seafood stew.

Oregano blooms are slightly more bitter than the leaf but can be used in the same way. A pesto with hazelnuts and oregano is a lovely. I also love a sauce with citrus and oregano for sweet potatoes or squash.

Passionflower are an exotic addition to your dinner party.

Rosemary blooms are tiny but sill pack a bit of flavor. Try vodka infused with rosemary and habanero. It’s also beautiful sprinkled atop an apple pie or try infusing a honey lemon blend.

Roses can be eaten whole or the petals removed. They taste much like they smell and are wonderful steeped into liquors or to flair pastries. The romans would bury them in urns for a week then place them on the tables to bloom during dinner parties.

Sage flowers are big and beautiful blue blooms that can be used anywhere you would use sage. We love them baked into breads, or fried and used as a garnish, they also make a beautiful addition to white bean dips.

Sunflower petals add a lively burst of color if not a lot of taste.

Thyme flowers can be used just as the herb but are more tender than the woody stems so they make a beautiful presentation whole.

Viola and pansies are so sweet on sweets. Brushed with egg whites and dusted with sugar they can last and last.

Woodruff tastes dainty and sweet just the it looks.

You can also eat the flowers of many vegetables try:
Zucchini
Arugula
Broccoli
Cabbage

Building a home for beneficial bugs

This lovely beneficial insect home build from gathered twigs, grasses and mossy bricks looks more like a piece of garden.

This lovely beneficial insect home built from gathered twigs, grasses and mossy bricks looks more like a piece of garden art.

In our gardens one can tend to think that all bugs are bad but in truth the vast majority are beneficial while only a few greedy ones give the rest a bad name. Beneficial insects help our gardens in three main ways – they are predators, pollinators and parasitiods.

The more diversity of bug life in the garden the better chance the bugs have of reaching a balance where predatory insects and garden munching buggers coexist and none can rise to the level of destructive pest.

You can encourage a healthy population of beneficial bugs in your garden by creating habitat that offers food and shelter for your new bug partners. A creative way to encourage a healthy insect population is to build a structure for protection from the elements as well as space to feed, mate, lay eggs and pupate.

Beetle banks, tunnel nests, bug hotels call them what you will they all help provide habitat for insects. They can be large or small, elaborately designed or quite simple.
Here are some of the basic requirements:

Shelter from rain can be accomplished with a layer of natural material or a proper roof made of tiles or pieces of wood.

Interior space can be made up of pieces of wood with holes drilled into them, bundles of twigs, layers of grasses, bricks or whatever natural material you may forage in your garden.

Most bugs prefer a sunny location. A south or east facing location is best for morning light.

Placement depends on the type of insect you hope to attract. Some like many predatory wasps prefer to nest above surrounding vegetation while others like certain spiders prefer a location close to the ground. It is a good excuse to have more than one insect habitat.

The best insect habitat can be a simple brush pile made up of larger branches interspersed with small twigs and loose material like leaves or grasses. It may sound messy but can be quite a beautiful addition to a garden when built with care.
A brush pile creates shelter for ground dwelling arthropods and nighttime predatory incects that need shelter from the sun such as lacewings.

Beneficial insects to purchase:
Ladybugs (only from a reputable source and never gathered from the wild)
Praying mantis eggs
Lacewing eggs
Parasitoid wasp pupae

The bad guys
Box elder Leptocoris trivittatus and L. rubrolineatus
Mealy bug Pseudococcus, Planococcusand Ehrhornia species.
Cabbage worm
Tomato hornworm
Corn worm

The good guys
Preying mantis
Green lacewing
Predatory thrips
Damsel bug
Big eyed bug
Minute pirate bug
Mirid
Stink
Assassin
Ambulady
Lady beetle
Rove beetle
Soldier beetle
Hover flies
Bee flies
Dance flies
Long legged flies
Predatory midges

Spiders
Orb weaver
Crab
Jumping
Daddy long legs

Parasitic wasps
Chalcids
Encyrtids
Braconids
Ichneumonids

Starting seeds indoors

24b5b556-8880-46d7-8885-ca6b98d53da7-1 When starting seeds indoors timing is everything.Before you even begin making a good plan of what you want to plant and backing it up by creating a calendar will make the whole process way easier to implement and enjoy.

After you have chosen the coolest seeds to start indoors be sure to check the dates to maturity, you don’t want your seeds to germinate and grow quickly and then have it be to cold outside to transplant them in the garden. So count back from the time to plant outdoors and mark your calendar accordingly. It can be a simple sketch with dates off to the side or you can geek out on an elaborate program. Here a link to a seed starting chart to help you get started  http://www.organicgardening.com/learn-and-grow/seed-starting-chart. And here is the farmers almanac – Best Spring dates for seeds http://www.almanac.com/gardening/planting-dates/OR/Portland

Now you are ready to plant.

Light is one of the most important elements in starting seeds indoors.  Seedlings that don’t get enough light will be leggy and weak and likely only survive to about 3 inches tall and then shrivel. If you have a good southern facing window you may not need additional lighting but everyone else should consider using a grow light. Also, lights will fade over time so bulbs should be replaced annually for best results.

Temperature is also a factor, if seeds are too chilly they might not ever emerge let alone thrive. Seed starting heat mats are available commercially and while they can really help the process they are not completely necessary as long as you monitor the temp. Seeds placed right in a window may get to cold from the drafts. Check seed packages for specific temp and light requirements.

Soil is also a big consideration. A seed starting mix is best as it will be a very light composition of peat-lite and will be easy for tender young plants to push through. Seed starting mixes also usually contain a very mellow amount of fertilizer just right for young plants. Regular garden soil isn’t the best option as it will contain lots of organisms and bacteria that could harm new plants.

Containers should always be clean and sterilized before use. You can use last seasons plastic pots, pop out trays, flats or even used plastic food containers like yogurt or hummus tubs just be sure that there are holes in the bottom for good drainage. Peat pots are an easy way to go as they have a specially formulated seed composite and you can plop the whole thing in the garden when ready to transplant. You can also make paper pots yourself.

Fill container about three quarters full with your soil medium. Leave enough room at the top so water can fill and drain into the soil without running over the sides (this will help you be sure to water each pot evenly) Check the seed package for desired depth.

Water is essential when starting seeds. Make sure the soil in your containers is quite moist all the way to the bottom. Invisible dry pockets can form under the surface of new soil so its easier to pre – mix the soil with water in a bowl before filling containers. You don’t want the soil to be soggy but you also don’t want it to be at all dry. Take a clump up in your hands and lightly squeeze to remove any dripping excess before filling. Check moisture frequently and don’t let them dry out at all, a plastic or glass cover helps keep the moisture in.

Seedlings cannot be allowed to dry out but they are also very sensitive to damping off, a fungal disease which can become a problem if the soil is too wet. Keep your pots moist but never soggy and remove coverings once the seedlings begin to develop. Another thing that can help is to put a very small oscillating fan on the seedlings. This will keep air flow moving around the seeds and also forces the little plants to develop strong stalks but it can also dry them out so watch the water! Misters can supply just the right amount of water to the soil but you don’t want to leave leaves to wet and susceptible to fungal disease.

Hardening off is so important! Tender seedlings need time to adjust from perfect indoor to harsh outdoor conditions. Place seedlings in a protected outdoor location. You want to shelter them from winds hard rains and especially direct sunlight which can burn them. Start out with an hour or so a day and gradually work up to more time each day. A week generally gives them the right amount of time to adjust before being planted directly outdoors.

Fertilizers should be used cautiously in the beginning. You new plants need food to grow but too much can do more harm than good. There are some great seedling fertilizer mixes available just follow the directions and enjoy all those new baby plants for the garden.

Spring can come early for an impatient gardener

IMG_7002Gathering branches to force blooms inside

This time of year I get so excited about the coming Spring. All those buds are swelling on the branches but sometimes I just can’t wait another month so I bring in some bouquets from the garden to I can speed up the process to Spring inside my home. Flowering trees and shrubs set their blooms in the previous summer and fall, once they have gone through sufficient temperatures below 40 you can cut branches and force them to bloom early. What a joy it is to watch them bloom inside.

How to:
Gather healthy branches from areas of the plant that need to be thinned anyway. Look for small buds or spurs along the length of the branch. Always use good pruning methods so as not to damage the mother plant. Cut at an angle about 1/4 inch above divergent branching with a clean sharp tool.

Once inside remove any buds that would be under the water line, recut your previous cut and place the branches into a vase with at least a few inches of cool water. Place in a cooler or dimly lit spot as to much heat or light will simply dry out the branch before it has time to bloom. I sometimes place them in the basement for a week or so checking daily to look for the color to appear.

A tablespoon of white vinegar or lemon juice will help keep the water clear and a tablespoon of sugar will help feed the blooms.

If you are lucky you might even get your branches to root which means you will have a bunch of new baby plants to put out once the frosts pass in May.

Some of my favorites are the fruit trees – apple, pear, plum, peach and cherry.
Tiny bloomers like forsythia, quince, current, deutzia and mock orange are all very simple to force.
Lilac and Magnolia will last much longer if picked before the buds open.
Non traditional bloomers like willow,  whitchhazel, maples and redbud can also be gorgeous with their odd little Spring blooms.

IMG_4591

Screen Shot 2016-03-02 at 5.48.20 AMWe are now open every day of the week

Spring hours 11AM to 6PM

Come see what’s blooming today!

Screen Shot 2016-02-13 at 12.30.29 AM

Screen Shot 2016-02-13 at 12.50.12 AM

Screen Shot 2016-02-13 at 12.30.29 AMScreen Shot 2016-02-13 at 12.50.12 AM

Thicket is opening for the season

Thicket is opening this Saturday the 13th – Our summer hours will be 11 to 6 every day except Tuesday and Wednesday.


Come see all the great new plants!

cyclamen

cyclamen

Christmas trees are here!

We are now closed for the season but we will reopen on February first. In the mean time you can stay tuned to garden geekery at thicket pdx – facebook, instagram or sign up for our blog right here.

IMG_6225

Our retail shop is currently closed for the season but we are still available for garden consulting and plant nerd questions. We will reopen on Feb 1st with all the tools, supplies and plants you need to get your garden growing.

We are also doing some great classes and workshops at some of our favorite Portland shops this winter so visit our classes and events page for details or follow along at thicketpdx on your facebook or instagram account for updates, news and fun plant geekery all winter long!

What a lovely article from Loam magazine

IMG_2712


If you have not had the opportunity to visit Loam Magazine treat yourself to a wonderful read.
Loam is an environmental arts magazine that always seems to leave me feeling better about the state of the world.

“We see creativity and sustainability as symbiotic. Our hope is that in illuminating inventive responses to environmental issues, we can help these movements take root. So often, the doom and gloom approach to climate change makes people immobile: we can start to think why bother? Loam believes that meaningful change stems from a place of positivity. When we see examples of others making a difference, we are similarly inspired to adopt ecologically conscious practices. In this way, Loam is a collaborative space for cultivating sustainability practices but it’s also a playful space, a platform for profiling all the good stuff that’s growing in our community.” – Loam magazine

And we just happen to be profiled in their current issue – please visit at:
http://www.loammagazine.com/profiles/

You can also follow along on their many journeys via instagram:

https://instagram.com/loammagazine/

Green bean books is coming to thicket!

Screen Shot 2015-07-07 at 9.26.28 AMGrowing Things Story Time
Tuesday, July 7th, 11:30am – FREE
We are happy to welcome Green Bean Books to thicket for a Growing Things Story Time! Children will meet at Green bean books – 1600 NE Alberta Street – then walk up to thicket for a story in the garden. We will have lemonade and blankets to sit on so just bring your little person for a morning at thicket.


You can learn more about Green bean books here: http://www.greenbeanbookspdx.com/


Heavy Meadow!

Screen Shot 2015-05-19 at 11.23.47 AMWe have so many new plants in at thicket – Carnivorous sarracenias and sun dews as well as fly pollinated voodoo lily and cobra arisaema. These botanical strangers will rock your garden.
Come visit today!

Party for the Pollinators

ShareTheBuzz_2015_EventSocial


Come learn about the importance of pollinators in the garden. We will be at Whole Foods with Garden Fever, The Xerces society, Portland Urban Beekeepers and the Sabin Bee-Friendly peeps to talk about creating inviting gardens for pollinators. We will also be making flower seed bombs to fill in the meadow at whole foods and there will be free compost so bring your wheel barrow and come celebrate pollinators with us!

Saturday April 18th

Whole Foods – 3535 NE 15th Ave

10AM to 3PM

Zenger Farm fundraiser

Screen Shot 2015-03-17 at 10.49.55 AMWe want to help Zenger Farm promote and educate about sustainable food systems, environmental stewardship, community development and access to good food for all. This coming Friday the 20th 15% of our sales will be donated to Zenger – come help us help Zenger Farm!
Learn more here:
http://zengerfarm.org/index.php?page=spring-for-zenger

The edibles have arrived!

IMG_7384Along with all the greens and cold hardy vegetables we also have early season herbs and a large assortment of interesting edible plants. If you like berries we have strawberries, blueberries, raspberries, honeyberries, three kinds of currants, gooseberries, goji berries, josta berries and Himalayan blueberries. We also have several varieties of grapes, olives, edible akebia, kiwi and passionfruit, lemons and limes. Come get your food forest started today.

Spring is on the way

Thicket is closed up for now but we’re busy sourcing and propagating baby plants for the coming season – we’ll open back up in February with everything you need to get your garden growing.

daphne

November in the Garden

67828_10200538108750799_1349312954_nWell, it’s just about the end of the gardening season. This is the time of year that resent transplants to the northwest discover the difference between rain resistance and waterproof. We generally get about 6 inches of much needed but deeply resented rain this month.  Our winter rains usually come inland on warm winds from the Pacific Ocean on what locals refer to as the Pineapple express. These fronts are basically southern extensions of the Polar jet stream and are the main reason our winters are usually so mild. Here in the Northwest we traditionally have relatively warm weather with few deep freezes and lot’s of precipitation to keep our forests mossy, mushroomy and green. But who knows what the future weather will bring especially after the crazy cold and dry winter we had last year – it’s best to be prepared. Remember there is no bad weather just bad outerwear!
If you are hard core – invest in a good jacket and finish up the last of the seasons garden projects.
– Check for garden journal and give yourself a hearty congratulations on a great year!. Make notes on what did and did not work in the garden. Plan for additions or subtractions. Make a calendar of events to help you remember planting, pruning or any other important dates for the coming season.
– Freshen up potted containers with winter interest or fill with colorful cut branches or mosses gathered from the roof.
– It’s not to late to mulch but wet mulch is much harden to spread that dry. Also, be cautious of using bark which if overused can rob the soil of nitrogen. Never pile mulch thickly around the base of trees and shrubs as it can harbor disease and pests.
– Wrap tender plants with burlap.
– Drain hoses and store, turn off water supply to prevent freezing.
– Wet soil makes pulling blackberries, scotch broom and wild brambles much easier and satisfying to boot!
– Destroy any leaves and plants that may contain diseases like mildew or black spot that infected your summer crops. These diseases can survive in the soil to reemerge zombie like to attack next season.
– Turn over water pots. Empty pots of annuals and clean the containers to prevent diseases. Permanent plantings may prefer to be moved to a sheltered location out of the wind but even these plants will need some winter water so don’t completely cover.
– This is a great time for cutting away dead growth and raking away leaves and spent flower stalks. But while this will tidy up your beds it will also take away winter seeds for foraging birds and hibernation spots for beneficial insects. Consider leaving a few little piles or construct a beneficial bug condo.
– If you have a cold frame then greens and leeks can keep on producing into the winter.
– Make yourself a pot of tea from the mint you harvested in the summer and enjoy a bit of a break from your garden. Maybe even pack a thermos and go for a hike to “soak” in some of the beauty of The Pacific Northwest.

The subtleties of Autumn – what a wonderful time to enjoy the garden.

native ashAs our gardens begin to show the effects of the summer heat and now the cooler night temperatures, plants turn from lush greens to the colors of Fall – gorgeous umber and sepia tones, goldenrod and red. Petals drop, leaves fade and the graceful lines of plant structure emerge. The pattern of branch formations are finally visible and the striking textures of various bark that was hidden all Summer is now on display.

Weather can be highly variable this month. We can expect our first night frosts by mid month but these last weeks have been a glorious Indian summer with warm days and just a scattering of rain to freshen up the garden. Look for a pink tinge in the morning sky as this often means rain is on it’s way but a little moisture really makes for a perfect time to work the garden.

Here are some tips on gardening in October:

Pick a bouquet of branches and spent grasses, dried seedpods or evergreens to bring indoors.
Harvest late apples, pears, pumpkins or quince. Once the frosts come they will be damaged. Gather walnuts as well and store in a warm dry spot until heady to crack.
One last round of weeding will go a long way toward easing Spring clean up.
This is a great time of year to mulch with a compost, manure or composted bark to clean up beds and keep down weeds over the winter.
Continue planting bulbs for spring and summer blooms.
Its still perfectly fine to plant perennials now and since the rains are coming it will be much less work for you.
Start ground covers so they can spread out over the winter and come up full and fresh in the spring.
Cut back non shrub roses to protect from winter winds.
Move potted containers to a protected location where they will not fill with water and crack.
There is still time to seed some cover crops if planted early in the month. Cover crops in veggie patches help to keep soil in beds, they fix nitrogen, keep down weeds and give you something to look at besides bare dirt all winter long.
Pot up bulbs like narcissus and amaryllis to force for the holidays.
Bring in tender house plants that have spent the summer on the patio. Check for pests hitchiking indoors and give them a nice warm shower to clean leaves before the move inside.

September garden tips

Japanese anenomeVegetable gardening isn’t over yet!
Plant:
We still have time to get in short season crops from seed like radishes and beets. And you can plant all sorts of cold hardy greens like kale, mache, arugula, sorrel, asian greens, endive, and lettuces to harvest later in the fall. This is also the time to get garlic and shallot bulbs in the ground for harvest next year. For more winter hardy options for Spring harvest try kale, cabbage, or fava beans.

Protect:
Spread straw or mulch for added protection of overwintering crops or fallow beds.
Protect young fruit trees from insects and winter cracking by painting a strip on the lower truck with interior white latex paint mixed with a .5 ratio of water.
The downside to dry soil, cool nights, warm days and added moisture on foliage is that it is the perfect conditions for powdery mildew. Keep an eye out and destroy leaves as it appears.

Harvest:
As vegetables ripen pick them, remove the spent plants to your compost and replace with winter plantings, mulch or a cover crop to enrich the soil for next year.
If you want to collect seeds from your vegetables and flowering perennials see our previous blog post with tips.

Perennial beds and landscape maintenance:
Fall is one of the best planting seasons. The soil is still warm and easy to work and since the air temp has cooled a bit it’s much more pleasant for us too. Morning dew and (hopefully) the occasional shower is giving our gardens a bit of drink after the dry season and makes the soil easier to work too.

When you plant perennials and trees now you give your plants a jump on root development so they are better prepared for a beautiful show next season. Plants that have the fall and winter to develop will be better prepared for drought tolerance and to fight off disease and pests next season. Plus they will be more likely to set blooms and gorgeous foliage. The exception is borderline tender plants – which do better if planted in the spring so they have the summer to develop and prepare for their first winter out.

Bulbs are here too – if you want Spring bulbs to bloom now is the time to plant them. And if you want to force bulbs for the winter start looking now while the selection is best.

Dig plants that will not winter over such as dahlias and tender canna. Bring houseplants indoors. Divide iris, grasses and lilies. If you want to divide peonies now is really the only time of year it should be done. Remember to keep the peony roots close to the surface when replanting so they will be sure to re-bloom in the following year.

September can still be dry so watch the moisture level of transplants until the Fall rains come but hold back on watering after the night temperatures drop consistently below 50 degrees.

Saving seeds

photo

Has your garden gone to seed? Don’t despair – collect those seeds for next year or just bring them inside to enjoy.

If you have decided not to replant another round of Fall/Winter veggies and the old ones are bolting, consider letting them mature to seed and collecting for next years sowing.

While it is very easy and fun to save seeds there are a few challenges. Hybrid plants have great qualities like disease resilience and productivity but their seed is often sterile or won’t produce offspring true to the parent plant so it is better to not save seeds from hybrids, choose heirlooms instead.

Another issue that can arise in saving seeds is that some plant flowers are open pollinated which means they can cross with other plants in their family and their offspring are a bit of a wildcard. These plants include broccoli, basil, beets, cauliflower, cabbage, cucumbers, chard, celery, kale, melon, mustard, onion, parsley, squash and spinach. The good news is that some of our favorite plants will not automatically cross pollinate and so are very easy to save seeds – peas, beans, tomatoes and peppers are ideal.

Most seed heads will develop a pithy outer covering, look for that substance to begin disappearing, as the seeds start to emerge it it time to harvest. Remember that most of the drying process should be done on the plant to be sure the seeds have fully developed.

Peas and beans:
Allow the pods to remain on the vines until they brown and dry. Pick and take indoors to continue drying in an open mason jar for two more weeks.

Peppers:
Pick a robust very ripe pepper, bring inside and allow the fruit to whither and begin to dry (about a week). Scoop out the pith, remove seed, spread over paper in a cool dry place for 1 to 2 weeks.

Tomatoes:
Choose a beautiful tomato (you want the healthiest one you can find), scoop out the seeds and surrounding goo, place in a grass jar with a little water. You will allow this mixture to ferment for about 5 days after which the good seeds will sink to the bottom of the jar. Dry them off and spread over paper to dry for 1 to 2 weeks.

And don’t forget your flowers too – there are so many blooms that produce lots of seeds that you can simply let fall to produce drifts of flowers in seasons to come or you can collect them and help them along. Poppies, columbine and daisies, hellebore, sunflowers, feverfew, zinnias, cosmos, coreopsis, and so many more!

Once you have dry seeds to store place them in small paper bags and be sure to label them. Put dried seeds in the freezer for two days to kill any pests that may piggyback. They can be stored in a cool, dark, dry place or in the refrigerator. If you choose the fridge it is wise to include a packet of dry milk or silica in order to keep them moisture free.

August garden tips

photo 3
Summer is in full swing! And what better way to enjoy the fruits of your labor? Invite friends over for a BBQ and dish up some of those veggies fresh from the garden or simply enjoy the view of your personal oasis. Now is the time to relax and be in your garden.
Of course there are always a few improvements and projects to work on so here are a few suggestions:


– Consider landscaping with xerascaping (low water) or native plantings and creating a lower water usage and lower maintenance garden.
– Install an irrigation system – remember when we suggested you install one in march -It would be pretty awesome right now!
– Cut old raspberry canes that fruited to produce new wood for next year, thin excessive growth or suckers and tie chosen branches in place.
– Move containers to a shady spot if they are stressed by the heat.
– If you are pruning any shrubs in order to produce wood for next years bloom finish by mid month so they have enough time to harden off before winter.
– Harvest vegetables regularly to encourage new blooms and prevent the seeds from setting.
– It’s to late to plant sun loving veggies but you can still do more cole crops or plant greens and brassicas for a winter harvest.
– Take a break and visit some show gardens.
– Explore some new recipes or can up some of the bounty.

Harvesting vegetables – tips and tricks!

veggies
One of the most important things to remember when harvesting is that the job of a fruit or vegetable is to produce seeds so the more you pick the more it will encourage the plant to re-bloom and produce more crops. If too much fruit remains on a plant production will slow. So even if you can’t eat all those veggies pick them and give them away so your garden will keep producing.

Harvest fleshy vegetables early in the day before fruit has had a chance to heat up and is full of moisture. This will extend shelf life and flavor.

Toward the end of the season begin pinching off the new flowers of eggplant, peppers, melons, squash and tomatoes. These blooms will not have time to develop before the first frosts but will steal energy from the plant and make it more difficult for the existing fruit to ripen.

Asparagus – do not pull as this could damage emerging stalks below the surface, instead cut with a sharp knife. Harvest the first round early to promote more growth. Stop harvesting after the stalks become thinner and allow the plant to develop and store energy for the next season.

Basil – once the plant develops at least 5 stem divisions begin picking. Always pinch two leaves at a time removing an entire new growth section. Picking one leaf here or there will weaken the plant but pinching back to the last division point will encourage new growth. Once the plant goes to flower it will become bitter so keep pinching.

Beans and peas – pick even if you are not eating them to ensure more come on. If you are drying beans leave them on the stalk until the pods dry to a lovely brown then pick and store in a cool dark place.

Broccoli – is a cold season plant and once the heat comes on they tend to flower rapidly. Pick florets early because when the flowers open the entire plant can dry out and quickly wither. Broccoli will often produce additional side florets once the top has been harvested.

Cabbage – harvest the first heads when small but leave 3 to 4 leaves at the base as these will produce additional heads that can be grown to full size.

Corn – it can be tricky to tell when the right time is to harvest corn. A good rule of thumb is to start checking firmness about 3 weeks after the silks appear.

Eggplant – love heat which means that sometimes they can be difficult to grow in Portland. Pick them young for best results.

Garlic – stop watering when the first leaves begin to yellow and sag. Pull after most of the bottom green leaves have turned to brown. Shake off excessive dirt but do not wash , simply hang in a cool dark place and allow to dry for a few days then cure them as you do onions.

Lettuce – thin out small leaves to use as micro greens and to make room for the larger heads to develop. Pick often because once they go to flower they become bitter.

Onions – can be picked at practically any stage of development and eaten immediately as green onions, partially formd bulbs or big fatties at maturity. You will know when they are fully grown because the green tops will wither. If curing wait for a week or so, then pick them after a sunny stretch and leave them out to dry as this will kill the roots. Picking them when they are a little on the dry side also helps in storage because they will have less moisture stored in the bulb. To cure them fully for storage spread them out in dry airy spot and periodically turn them for at lease 2 weeks or until they no longer have any wet spots.

Peppers – pick young and tender and often. If you want to dry hot peppers pick before the rains come, wash and hang to dry, if they are not quite mature pull the entire plant and hang in a cool dry dark place upside down.

Summer squash and zucchini – pick them while they are small to encourage the plant to keep producing. And check plants often as they have an amazing ability to hide in plain sight until they are big enough to make a boat.

Tomatoes – You will know when your tomatoes are ripe because they will leap into your basket at the slightest tug. If the cold season is approaching and you still don’t have ripe tomatoes remove all the emerging blossoms and immature fruit, you can also withhold water to try and shock the plant into ripening the fruit. If the temperatures drop harvest the fruit with some vine attached and place in a cool dark place as opposed to a sunny window.

Winter squash – wait until the vine has withered, pick and wash with a week solution of bleach to remove bacteria that can cause rot. Let them dry in a cool place for about a week until a they can resist a fingernail in the skin, then place them into cold storage.

Melons – will not continue to ripen once they have been picked so don’t pick them to early. A thump of your thumb resulting in a hollow sound means they are ready to be eaten.

Fruits and vegetables stop setting fruit about 2 weeks before the autumnal equinox (this year Tuesday Sept 23rd) so most harvesting of summer crops should be completed about this time. But if the days stay warm and night temperatures don’t drop to low some fruit can continue to ripen on the plants – just keep an eye on the weather.

Watering tips for hot weather

watering can


In this heat Veggies and plants need to be watered almost every day but with a little planning and care you can preserve water and keep more of your precious time for playing in the sun! Here are a few tips to keep your garden lush and green even in this heat!

Soaker hoses are one the best way to deliver water to plants. They soak the soil around the base of the plant where its needed most instead or sprinkling from above where much is lost to evaporation. Hardware stores have great systems that can be installed over an afternoon or a weekend depending on how elaborate you go.

Automatic watering systems on a timer ensures that your plants get what they want when they need it and makes lots more time for you to enjoy the garden.

Water early in the morning or later in the evening. This can help conserve water as less is lost to evaporation and most plants will be feeding during those times.

Avoid misting plants in the heat of the day, overhead watering can burn plant’s leaves if applied in direct sun and moist leaves are subject to molds, fungus and disease. Plus you are more likely to end up with burned shoulders as well. Some plants such as Rhododendrons curl their leaves to conserve water – don’t be tempted to mist wilted leaves until the cool part of the day.

Potted containers in direct sun will most likely need to be watered every day. Pots cannot hold much moisture and are generally way hotter than soil under ground so they will dry out much faster. It’s almost impossible to over water a pot but so easy to forget to water at all. Having a regular schedule helps.

Even drought tolerant plants will need to be monitored their first summer until their roots are established. Even if the tag claims low water and “xerascaping” dosn’t mean you can plop it in the ground and forget about it. Once rooted out and established these plants are wonderful low maintenance options and a great way to conserve water in the garden but in their first season they will still need a little care to really thrive!

Plants that have been stressed by drying out are much more susceptible to disease and pests so keep those plants watered.

Watering the garden will be so much more fun with a stylish new watering can from thicket! Come see our new selection today!


Plant diseases

photo 2Plant diseases are infuriating! – It is just horrifying to see all our hard work withering on the vine. Preventative medicine as opposed to treating symptoms after they have become a problem is always the best approach so here are a few tips to keep your garden healthy and disease free:

When shopping for plants look for disease resistant varieties and choose plants that are vigorous and healthy. Shopping with a reputable grower is always a wise choice.

If you notice any sign of disease on plants immediately remove damaged parts and if necessary the entire plant. Composting will not always kill pathogens which can spread to additional plants or even overwinter in the soil so diseased plants should be sent out with the trash or burned.

Choose the right plant for the right location – If a plant is stressed because it is in the wrong spot – has too much sun or too much shade it will be more susceptible to disease. The same it true of water and fertilizer – the wrong amount of either one can cause more damage than good.

Rotation of vegetable crops will help break the cycle of disease by eliminating the build up of diseased organisms in one spot.

Over crowding of crops can create too much humidity and fungal disease. Keep air flow moving by good planning and thinning.

Keep the garden tidy by turning under finished crops before disease causing organisms can take over. And clean tools and especially pruners in between uses to keep from spreading disease from an infected host.

Preventative treatments like dormant sprays can be a safe way to protect plants – be sure to follow instructions carefully.

COMMON DISEASES
Because of our high rainfall and mild climate fungal and bacterial diseases are the most common problems in Portland. Here are a few to keep an eye out for:

AIRBORNE FUNGAL DISEASES
Botrytis blight
This fungal disease looks like a grey powdery mold. It primarily appears on vegetable, bulbs and some perennials. Strawberries and zucchini are especially susceptible. Look for wet looking spots on leaves or fruit which will turn into a powdery grey mass. The entire plant can sicken and die so deal with it as soon as you spot it.
Air circulation is the best defense as this fungus prefers warm and humid areas. More sun also helps so pruning neighboring plantings can be useful so avoid wetting the leaves of susceptible plants while watering. Finally – remove and destroy any infected plant parts and wash tools and hands after.

Powdery mildew
Another fungal disease that commonly affects PNW gardens is powdery mildew. Late Summer is the time to look for white powder splotches that envelop leaves and stems. Cucumber, beans, zucchini, squash and roses are among it’s favorite victims. Although it can cause serious damage if left unchecked it is possible to minimize spread and still reap a harvest from infected crops.
Making space for air flow and maximum sun is essential. Well watered plants are less likely to fall victim but be sure to water from below and avoid water on leaves. Remove and destroy damaged foliage. A solution of 1 T baking soda to 1 gallon water and a tad of liquid soap spayed onto the leaves will also help.

Rust
There are a gob of different fungi that produce rust but the prevention, identification and treatment is similar. Orange to yellow spots present in speckled formation on the leaves. Spring or late Summer is the usual time for it to appear as the fungi prefer mild days and cooler damp nights.
Again overhead watering should be avoided to restrict the spread of rust. More sun also helps. Remove rusted leaves and garden debris to prevent the cycle of reinfection.

Scab
Commonly attacks apples and pears in the Spring right after flowering. It looks just like it sounds with with yellow to brown to black blotches on the leaves and sometimes the trunk. Leaves can eventually drop and in extreme cases defoliation may occur. Fruit can also appear scabbed but is still edible.
Remove and destroy damages areas. Pruning for air circulation is helpful but in extreme cases a copper spray can at lease prevent against another infection the following year.

SOIL/WATERBORNE FUNGAL DISEASES

Ramorum blight and tip dieback
The symptoms vary widely according to the host plant but generally look for bark cankers especially ones that are bleeding or girdle the entire circumference of the trunk. Leaf spotting or blotches appear in areas of the leaf that can collect water such as at the tips or the midribs.
This disease only first appeared in 1995 but has quickly spread. It can affect many types of native oaks, rhododendrons, myrtle, bay laurel, madrone, cascara, redwood, douglas fir, kinnikinnick, salmonberry, and evergreen huckleberry. It also attacks viburnum, camellias and pieris among others.

Root rot
The risk of root rot comes in the winter as water drenched soil robs roots of oxygen and makes them susceptible to this soil fungus. Signs may not appear on the plant until the early summer when the plant is unable to draw water through its damaged roots. Plants may appear wilted with leaves eventually browning but adding water will not help. Prevention is the best approach start with healthy plants and create good drainage before planting. A mycelium application will improve soil conditions and root health. Mulching can also help to discourage spread by cooling the soil. If unable to recover replace plants with a resistant variety that is suitable to the location.

Verticillium wilt
Look for one single branch showing signs of stress – wilting or the leaves turn brown while the rest of the plant looks perfectly fine. Often a long canker will also appear in the affected area and a ring will be present in the cross section of a cut branch. This soil borne fungus will attack many plants but maples are especially at risk. Complete lists are available online.
A similar disease attacks tomatoes, peppers and eggplants.
Established trees can sometimes be saved by removing affected branches and building the up soil health. Apply a thin compost but avoid high nitrogen, potassium is better. Clean tools immediately after use as the disease can be easily spread to other plants. If the plant needs to be removed replace with a resilient species.

BACTERIAL DISEASES
Bacterial blight
Rapidly wilting leaves and dark splotches that manifest in the rainy spring can mean a bacterial infection. Remove and destroy affected parts and plants. Wash tools between each cut to avoid spread and wash hands before moving to another area of the garden.

Fireblight
This bacterium can move quickly and so the symptoms progress rapidly. Leaves and entire branches can redden and drop within days. Affected areas should be removed and burned as soon as detected. Cuts should be made at least 12 inches below the affected area. Tools need to be cleaned between cuts. This bacterium is transmitted by pollinating insects and infected plants can act as hosts and spread rapidly to other plants.

The Pacific Northwest Plant Disease management handbook is available online and has an exhaustive list of diseases. It is organized by host so it makes identifying the disease a little easier. Be sure you have the right diagnosis before beginning a treatment and please try natural methods before resorting to harsh chemical applications.

http://pnwhandbooks.org/plantdisease/host-disease-descriptions

Growing air-plants

airplantsAn Air-plant or Tillandsias is part of the Bromeliad family. Air-plants are native to the americas and have an amazing range from the southern US all the way down to south America. There is an astonishing variety of air-plants that have developed out of their diverse habitats. Tillandsias like many bromeliads get their nutrients and water primarily through their leaves and therefore do not need soil to survive.

Watering
It is practically impossible to overwater an air plant since they only absorb the moisture they need. But they do need to be able to dry between waterings. A soggy location is not healthy for the plant and they should never be left in a position so that water accumulates in the center of the plant as this will cause rot.

Frequent misting works just fine for air-plants but they really love at least a weekly soak in lukewarm water and can even occasionally soak overnight. Be sure to shake out excess water after each soak. Watch the plants closely to determine how often you should be watering as different homes and even parts of the home will vary in humidity.

Signs that your air-plant is under watered.
Tips of the leaves may turn brown.
The natural curvation of the leaves will increase.
Leaves will feel stiff.

Air-plants do not like to dry completely and prefer a humid environment. If it seems under watered they can be revived with a good soak. When moved to a new environment even from one room to another they will often shed their bottom leaves – don’t despair as this is just part of their acclimation process and they will often recover.

Fertilizing
Tillandsias like a litter fertilizer once a month or so. You can use a bromeliad or orchid fertilizer look for foliar feeds and follow the instructions on the bottle for amount.

Location and light
Air-plants seem to do best when paired with other plants. I tuck them in and amongst my other plantings but am sure to not place them directly in the soil where they might set in water for to long and get soggy.

There are many species of air-plants and some require more light than others. Like most houseplants they enjoy a nice bright but diffused light. Of course here in the northwest light in the winter is a premium so they may need to be moved to a sunnier location during winter months.

Many people like to keep their air-plants in the bathroom so they can take advantage of the extra moisture. And while this is true you will still need to water the plants. Unless you live in a dorm with people showering around the clock most bathrooms do not retain enough moisture to keep air-plants happy. Another consideration is light, many bathrooms have very little light so unless you have a nice big window the bathroom may not be the best spot for your tillandsias. One last consideration is heat. Bathrooms in older homes tend to be a bit chilly and air-plants enjoy consistently warm environments.

Containers
You can mount air-plants onto wooden boards, natural logs or driftwood.They also work well on ceramic or brick mediums. When attaching an air-plant avoid copper wire or superglue as they will poison the plant. Moss can hold a lot of water so use caution so that your air-plant doesn’t stay to soggy. Air-plants are often placed in all sorts of containers. The main things to remember is that they will need some air flow and never want to be in standing water.

Propagation
Tillandsias produce offshoots called pups. They shouldn’t be removed until they are about 1/3 of the size of the parent plant. You can leave them together to form a nice clump or if you decide to divide them gently pull in a twisting motion. Some varieties will die after blooming but will often send out tiny pups at the same time, leave the mother plant intact until it dries completely.

Thicket is offering several classes on Tillandsias this summer so stay tuned to our events page and come in to make your own mounted air plant project.

June tips

Poppies
June can be a scorcher or we can lapse into “Juneuary” with cold temperatures and dreary days that make us long for a real summer. But either way June is a great month for gardening. The weather has warmed enough to get those new plant starts growing and it’s not too terribly hot so we can enjoy being outside and keep those garden projects moving along comfortably.

Water
It was an insanely dry winter and now our farmers and agricultural families are paying the price so please do your part and conserve water! Here are a few easy tips.
Water in the morning when less will evaporate and the plants are taking up water more efficiently so less is lost.
Direct water close to the roots where it is needed most instead of overhead.
Consider installing a drip system to save water and your precious time.
See more watering tips in posts from July 2013.

Pests and diseases:
This is the season for the pests to thrive. Prevention is much better than reactive control. Specific plantings and building bug houses are a great way to help those beneficial bugs.
You can visit our pest management post to help identify pests and comprehensive ways to deal with them effectively. Look for caterpillars, aphids, slugs, thrips, whiteflies, flea beetles and cutworms – boy there are a lot of them out there!  As a last resort start with the least invasive treatments:
– Insecticidal soap
– Horticultural oils
– Botanical insecticides
Fungal problems such as black spot or powdery mildew appear this time of year treat where appropriate with anti fungal solutions, trimming and by thinning to creating air flow.

Vegetable garden tips:
Start cooler weather crops like greens and cilantro in a shadier spot like behind your row of tomatoes or under your bean pole so they will get a little protection from the hot sun to come.
Deadhead garlic blooms so that growth energy is focused on the bulbs and use the scapes in a stir fry.
Pick those strawberries! If left to rot they will invite disease.
Cage, trellis or stake tomatoes and vines before they get to big and unruly.
Invest in a dandelion weeder and save your back.
Feed starts with and organic fertilizer or a composted manure or bio-mulch.
Thin your plantings of greens, beets, radishes and onion to use as micro-greens.
Adding a mulch can conserve moisture and help keep weeds at bay.
Squash (or any of the curcubits) blossoms may drop but not to worry this is a natural process where the first flush of male flowers drop after pollination. The second flush of flowers are the female blooms and they are the ones that will develop into fruit.
Resist the urge to cut suckers on fruit trees as it will only encourage more growth now.

Seed outdoor:
For your rotation plantings add – arugula, asian greens, beets, broccoli, carrots, chard, green onions, kale and lettuces.
For the first round of seeding – basil, beans, corn, cucumbers, melons, pumpkins and squash are all ready to go out.

Starts for direct planting:
Just about everything can now go in the ground! arugula, asian greens, basil, beets broccoli, brussels sprouts, carrots, chard, cauliflower, chives, corn, cucumbers, dill, eggplant, green onions, leeks, kale, lettuces, melons, peppers, pumpkins, squash and tomatoes.

The veggies are really coming in now! Greens galore, peas and broccoli, cabbages and herbs oh my! Eat up and enjoy all that hard work!

Basic Garden glossary

photo 2An old (and crotchety) family friend once told me that you only have to know three words in any one field to pass yourself off as an expert. Just “say it with authority” he instructed. So with that in mind here is a nice little list of helpful garden terms that will hopefully be informative, useful and if you want to pass yourself off as an expert you apparently only need to remember three.

Acidic soil – Any soil with a pH lower than 7.

Alkaline soil – Any soil with a pH higher than 7, often associated with hard water.

Annual – A plant that completes its life cycle in one year.

Bare-root – Dormant plants that are taken out of the ground, removed of their soil, and preserved until shipping and planting.

Biennial – A plant that completes its entire life cycle in two years, growing in the first year and reproducing and dying in the second.

Bolting
To flower and produce seed prematurely. This is usually the result of excessive heat and sun exposure.

Bud union – Refers to the point at which the plant has been grafted on to a rootstock and is usually found at soil level. This is the result of a technique called ‘budding’ where the bud of one plant is grafted on to another plant.

Bulb – An underground storage organ with fleshy scale leaves from which the plant flowers and grows before becoming dormant.

Cane -The stems of a raspberry or blackberry plant. Raspberry plants are supplied as dormant canes.

Cloche – Structure made of glass, plastic or horticultural fleece placed over a plant for protection or for forcing early crops.

Cold frame – Unheated frame for growing on and acclimatizing hardy and half-hardy plants outdoors.

Companion planting – The belief that two plants growing near each other produce mutual benefits.

Compost – A mixture of decaying, organic materials (such as kitchen scraps) used for soil amending, fertilizing, and mulching.

Corm – A rounded underground storage organ, consisting of the stem base, and often with a fibrous outer layer. It is replaced by the plant annually.

Crown -The growing point of a plant from which new shoots emerge, at or just below the soil surface.

Cutting – A plant propagation method wherein a part of a plant is cut and dipped in a rooting hormone to eventually grow into a new plant.

Cultivar
A plant that is bred or selected by growers for unique flowers, leaf color, growing habit etc. It has distinct and uniform characteristics that differ from the original species.

Dead-head – To remove the spent blooms on a plant to encourage further flowering or to prevent self-seeding.

Deciduous – A plant that sheds its leaves each year.

Direct Sow -To sow seeds outdoors in their final positions, where you would like them to flower or crop.

Read More

Plant a cutting garden

Why not bring the beauty of your garden inside – Consider planting a cutting garden this year so you can enjoy all the lovely flowers in your home as well as the garden. Here are some suggestions for creating and harvesting your own cutting garden.

garden gatherings
Don’t be limited by traditionally used flowers. There is a whole world of interesting botanical textures out there. Twigs and branches can be especially nice to create line and form in a bouquet. Grasses and ferns can add a wispy soft texture. Vines with their twisting airy form can add movement and whimsey. There are also tons of beautiful forms after the plant has faded – seedpods and the dried bits of previous seasons blooms. Not all plants will last as a cut flower but experiment and see what might hold. Below are some tried and true perennials that you might already have planted in your garden:
Clematis
Daphne
Dusty Miller
Dogwood
Eucalyptus
Euphorbia
Ferns
Fruit branches
Grasses
Hosta
Honeysuckle
Hebe
And don’t forget about all those old classics:
Lilac
Hydrangea
Roses
Rhododendron

Read More

May garden tips

photo 2

May Is the month for gardeners in the Pacific Northwest!


The rain may still be here but let’s get ready for summer parties,  reading novels in the sun and all the bounty of our veggie gardens! The best selection of plants for the whole year is happening right now so come to thicket to pick out the perfect plants to really make your garden shine!

 
Planting tips for new starts – 
Dig a hole about a third bigger than the potted plant and work the surrounding soil to be planted to ensure good drainage. Loosen the soil and roots in the pot before planting. Mix in a little organic matter for an added boost. Pat down the soil into the hole and water deeply.
You will need to continue to check the water frequently. Even the most drought tolerant plants will need a season of care before they can be left alone. A small depression for catching water can be helpful. Consider a water bag for larger trees.

 
Root bound plants
 – You may need to tap the pot to remove your plant. If it is extremely difficult to remove cut slits,
Check to see if the plant is root bound. Are the roots very dense and tight? Loosen the root ball or in some cases even take a sharp knife and cut vertical slits in the root ball. This encourages the plants roots to divide and expand. Look for a wound tap root. Not all plants have a tap root – if it has one it should  be clearly visible – they can wind themselves around the bottom of the pot and it is very important to unwind and get it growing in the right direction! A wound tap root can continue to grow in a circular fashion and never develop into an anchor for the plant. Sometimes a tree can topple over 5 years after it was planted because the tap root was not properly planted.

 
Potted patio containers – 
A few colorful planters added to a patio or porch can enliven an entire landscape.They can be a reflection of your personal style and are a great way to add instant color and interest.  We have hanging baskets, pottery and all sorts of non traditional containers, as well as some very interesting annuals and textural elements to spruce up those pots.

 
Water gardens – 
Turn water pots right side up. Bring out the water plants, raise water lilies and clean up carnivorous plants by pruning off the old winter heads. Place mosquito dunks now before those buggers move in.

 
Maintenance
 – Finish any divisions before the heat of summer is upon us. Continue the search for pests and be diligent with weeds. Deadhead spent flower heads to encourage new buds. Leave spent foliage to feed the bulbs of bulbs like tulips and daffodils. Now is the best time of year for hedging as new growth will appear quickly and reduce the time you have to look at a whacked bush. If you need to prune your rhodies and want blooms for next year do it right after they have bloomed, or if you have a lovely old rhodie with a beautiful shape but it has hideous purple flowers consider pruning it later in the season as you will likely take off the new buds and inhibit the bloom for next year. Add some lime to your soil for fruiting vegetables like tomatoes, squash and peppers to prevent blossom end rot.

 
Water
 – The garden can begin to dry out this time of year but overwatering can be just as bad for the health of your plants so getting a water plan in place is wise.
- Plan your garden so that thirsty plants are grouped together while drought tolerant plants have their own spot.
- Water earlier in the day to avoid evaporation
- If you use sprinklers be sure that they are placed reasonably and use timers to avoid waste.
- Soaker hoses and drip irrigation systems are more efficient.
- Mulch can help conserve moisture in the ground.
- Water less frequently but deeply to ensure water gets to the roots.

 
Vegetables
 – May is for planting warm-season vegetables like basil, tomatoes and peppers but not until the danger of frost is past. Check the local farmers almanac for predictions and be prepared to cover seedlings if the temperature drops. It is generally still a little chilly for squash, eggplant, cucumber and melon but they can go out if you are prepared to give them a little protection. Healthy plants can be so stunted by early exposure to cold weather that they never fully recover and your harvest is minimal. But, if you wait to long to plant cabbages lettuces, cilantro and broccoli, the coming hot weather will make them bolt and spoil your crop.

 
Starts
 – Artichoke, Basil, Broccoli, Beans, Cauliflower, Celery, Collards, Eggplant, Kale, Leeks, Lettuce, Onions, Parsley, Peppers, Squash, Swiss chard, Tomatoes

 
Seed indoor – 
Basil, Brussels sprouts, Cucumbers

 
Seed outdoor
 – Arugula, Asian greens, Basil, Beans, Beets, Broccoli and Brussels sprouts(for fall crop), Cabbage, Carrots, Cauliflower, Celery, Cilantro, Corn (after the 15th), Dill, Kale, Lettuce, Parsnips, Pumpkins, Radish, Salad greens, Spinach, Summer squash, Swiss Chard, Turnips, Winter squash

 
Indoor plants – 
If you have tender plants that need to go back outside for the Summer it’s time for the great migration. Start in a shady location so you don’t burn the leaves that are not yet accustomed to direct sun. Give them all a little outdoor shower to clean off dusty leaves. A little extra food is a good idea as they will now have a growth spurt.

 
Let’s move the patio furniture back outside and start the summer parties!

Beneficial insects in the garden

safe_image.phpBeneficial insects help our gardens in three main ways they are predators, pollinators and parasitiods. Insectary is the term used for a garden bed planted for bugs and it may seem strange to encourage bugs in the garden but by creating a healthy ecosystem for an array of  bugs your garden is less likely to be overrun by the rotten ones that destroy our flowers and crops.

Predators eat the bugs that are eating our plants. The main predators that we like in our Portland gardens are Big-eyed bugs (yes that is what they are really called) Green and brown lacewings, Praying mantis, Ground beetles, Damsel bugs, Spiders, Centipedes, Syrphid flies (hover flies) Ladybugs and Minute pirate bugs. Many of these bugs feed in both their adult and larval stages so it’s great to have them around for their entire life cycle.

Pollinators are critical, they move pollen from male to female bits to produce our veggies and fruits. Great pollinators here are: Honey bees, Bumblebees and Mason bees but there are many more bugs such as Syrphid flies that also act as pollinators.

Parasitoids live part of their life cycle on or in a host and usually destroy the host in the process. Most parasitoids are small stingless wasps and flies.

You can encourage beneficial bugs in your garden by creating an inviting environment for them.

– Make happy bugs by providing protection in the form or groundcovers, mulches, small piles of sticks and yard debris or bug houses. These bug retreats should be located in a warm dry place and put out early in the season to encourage new arrivals.

– Bugs will also need a source for water, They can survive off of regular morning waterings or indulge them with a bird bath or water feature.

– Many of the beneficial insects also feed on nectar in addition to pest bugs so plantings that attract them can help create a healthy ecosystem for diverse bug life.
Attractive plants for beneficial insects:
Angelica
Anise
Bishops Weed
Chamomile
Coreopsis
Cosmos
Clover
Caraway
Coriander
Dill
Goldenrod
Lovage
Liatris
Marigold
Mustard
Pincushiuon
Sunflower
Scabiosa
Yarrow

You can also purchase beneficial bugs to seed your garden with healthy bug life:
Ladybugs
Praying mantis eggs
Lacewing eggs
Parasitoid wasp pupae

Starting seeds indoors

photo
When starting seeds indoors timing is everything.Before you even begin making a good plan of what you want to plant and backing it up by creating a calendar will make the whole process way easier to implement and enjoy.

After you have chosen the coolest seeds to start indoors be sure to check the dates to maturity, you don’t want your seeds to germinate and grow quickly and then have it be to cold outside to transplant them in the garden. So count back from the time to plant outdoors and mark your calendar accordingly. It can be a simple sketch with dates off to the side or you can geek out on an elaborate program. Here a link to a seed starting chart to help you get started  http://www.organicgardening.com/learn-and-grow/seed-starting-chart. And here is the farmers almanac 2014 Best Spring dates for seeds http://www.almanac.com/gardening/planting-dates/OR/Portland.

Now you are ready to plant.

Light is one of the most important elements in starting seeds indoors.  Seedlings that don’t get enough light will be leggy and weak and likely only survive to about 3 inches tall and then shrivel. If you have a good southern facing window you may not need additional lighting but everyone else should consider using a grow light. Also, lights will fade over time so bulbs should be replaced annually for best results.

Temperature is also a factor, if seeds are too chilly they might not ever emerge let alone thrive. Seed starting heat mats are available commercially and while they can really help the process they are not completely necessary as long as you monitor the temp. Seeds placed right in a window may get to cold from the drafts. Check seed packages for specific temp and light requirements.

Soil is also a big consideration. A seed starting mix is best as it will be a very light composition of peat-lite and will be easy for tender young plants to push through. Seed starting mixes also usually contain a very mellow amount of fertilizer just right for young plants. Regular garden soil isn’t the best option as it will contain lots of organisms and bacteria that could harm new plants.

Containers should always be clean and sterilized before use. You can use last seasons plastic pots, pop out trays, flats or even used plastic food containers like yogurt or hummus tubs just be sure that there are holes in the bottom for good drainage. Peat pots are an easy way to go as they have a specially formulated seed composite and you can plop the whole thing in the garden when ready to transplant. You can also make paper pots yourself.

Fill container about three quarters full with your soil medium. Leave enough room at the top so water can fill and drain into the soil without running over the sides (this will help you be sure to water each pot evenly) Check the seed package for desired depth.

Water is essential when starting seeds. Make sure the soil in your containers is quite moist all the way to the bottom. Invisible dry pockets can form under the surface of new soil so its easier to pre – mix the soil with water in a bowl before filling containers. You don’t want the soil to be soggy but you also don’t want it to be at all dry. Take a clump up in your hands and lightly squeeze to remove any dripping excess before filling. Check moisture frequently and don’t let them dry out at all, a plastic or glass cover helps keep the moisture in.

Seedlings cannot be allowed to dry out but they are also very sensitive to damping off, a fungal disease which can become a problem if the soil is too wet. Keep your pots moist but never soggy and remove coverings once the seedlings begin to develop. Another thing that can help is to put a very small oscillating fan on the seedlings. This will keep air flow moving around the seeds and also forces the little plants to develop strong stalks but it can also dry them out so watch the water! Misters can supply just the right amount of water to the soil but you don’t want to leave leaves to wet and susceptible to fungal disease.

Hardening off is so important! Tender seedlings need time to adjust from perfect indoor to harsh outdoor conditions. Place seedlings in a protected outdoor location. You want to shelter them from winds hard rains and especially direct sunlight which can burn them. Start out with an hour or so a day and gradually work up to more time each day. A week generally gives them the right amount of time to adjust before being planted directly outdoors.

Fertilizers should be used cautiously in the beginning. You new plants need food to grow but too much can do more harm than good. There are some great seedling fertilizer mixes available just follow the directions and enjoy all those new baby plants for the garden.

Moon Planting

My great great grandmother Ina was a native American farmer in Colorado. My grandmother Lucille remembers her garden as one of the biggest and most beautiful in the whole county. Lot’s of people teased her about planting by the moon but nobody argued about the size of her harvests!

For centuries farmers have planned not only the planting and harvesting of crops according to the phases of the moon but all sorts of seemingly unrelated farm activities like when to wean animals, when to set fence boards and even when to cut the lawn have traditionally been planned according to the cycles of the moon!
This ancient practice has fallen out of style but speaking from experience – it can work!

The basic explanation of the benefits of planting by the lunar cycle is that the moon governs moisture. Pliny the Elder, the Roman naturalist, wrote that the Moon “replenishes the earth; when she approaches it, she fills all bodies, when she recedes, she empties them.”

Water on the earths surface is influenced by the gravitational pull of the moon. Imagine the moon pulling the tides in the oceans across the globe. The theory is that the moon has a pull on all bodies of water, or bodies that contain water such as plants and animals and even human beings. This is a subtle pull but it has a very real effect. This lunar pull also brings moisture in the soil closer to the surface, which encourages things like growth and germination.

The moon has four phases or quarters each one lasting about seven days. The first two quarters, between the new and the full moon are called the waxing moon, this is the period that the moon appears to be growing. The third and fourth quarters occur after the full moon when the light is waning and it looks as if the moon is shrinking again.

Vegetable planting tips guided by the phases of the moon

The first quarter:
After the new moon, when the moon is completely dark, it begins to gradually “grow” pulling energy towards the earths surface which encourages seeds to swell and germinate. This phase of gentle pull makes for a balanced time for both root and leaf development. Plant seeds for vegetables with above ground fruit but that set their seeds outside the fruit – Broccoli, cabbage, celery cauliflower, lettuces, spinach and greens. Cucumbers and zucchini are an exception as they can also be planted in this phase.

The second quarter:
During this phase the moon is growing and the pull is increasing which makes for strong leaf growth. Plants that produce above ground with their seeds inside the fruit do very well planted in this phase. Beans, and peas, peppers, squash, eggplant and tomatoes. Two days before the full moon is an especially good time for planting in general and is the best time to transplant starts or any new potted additions to your garden because as the moon transitions into and past the full moon root growth will be coming into it’s prime this includes perennials and ornamentals as well as fruit trees, potted herbs and vegetables that have been started indoors.

The third quarter:
This is the time directly after the full moon. The moon is at its peak pull creating the most moisture in the soil, but that pull is beginning to diminish. Root crops do best planted in this phase as energy is dropping back down into the deep soil and root systems. Veggies to plant now – beets, radishes, garlic, onions, potatoes and carrots. You can also gather seeds and harvest fruits, herbs and vegetables for their peak time near a full moon.

The fourth quarter:
This phase of the moons cycle has the pull dropping to it’s minimum as it moves toward the new moon. It is called a fallow moon and is generally a time of rest for the plants in the garden but there is plenty to do for the gardener. Now is a great time to transplant or divide plants, compost and remove brush as well as pruning for retarding growth. You can also apply side dressings and composts at this time. You will actually find that pulling weeds is much easier after a full moon and lawns mowed will grow back at a slower pace.

If you want to learn more about the subtleties of gardening by the moon or simply want a calendar of planting dates without any research or physics required – pick up a copy of the Farmers almanac. And for a strangely modern twist on this ancient practice download the application for use on a mobile devise.

April gardening tips

IMG_2944
Weather can be highly variable in April. We can get beautiful sunny warm days followed by a drop back into the depths of winter. But for hardy gardeners there is no bad weather just bad outerwear. And this is the funnest time of year to add new perennials to your landscape. The sun drawing out those Spring blossoms, the gardens seem to be overflowing with new growth and the air is thick with the smell of earth and the song of birds. So let’s get out and garden!

Maintenance
If you have a profusion of new growth and are trying to control the size of any flowering shrubs or vines like camellias or clematis – after their bloom is a good time to prune them back to a reasonable size.
Place support rings around peonies, swallowtail columbine, and or any other perennials before they topple over with all those blooms to come.

Pests and diseases
Pests are on the rise. Control aphids before they get to your veggies, look for them on roses and in the veggies garden they might be lying in wait for the broccoli to come out.  Mix a teaspoon of dish soap in a quart bottle and spray liberally on the effected plant. If you are lucky enough to have garter snakes let them be – they feast on slugs this time of year! If spider webs appear remember that they will consume an amazing number of mosquitoes for you in the coming months.

Keep an eye out for fungal diseases to appear and treat before they get out of hand.

Weeds are planning the complete takeover of your garden so get at those dandelions before they have a tactical advantage.

Indoor plants
As summer approaches it will soon be time for all our tender plants that we have overwintered to go back out for the summer. Take your succulents, orchids or whatever rare lovely that you have kept inside and give them a good dose of love – transplant into larger containers, trim off unsightly dead growth and give them a bit of fertilizer in anticipation of moving outdoor next month.

Vegetables
Seed inside:
Tomatillos, tomatoes, asian greens, basil, cucumber, melons, pumpkins and squash.

Seed outdoor:
Arugula, beets, carrots, chives, cilantro, dill, green onions and second rounds of kale, chard, lettuces and spinach.
This is your last chance for root and cool weather crops like radishes, beets, cilantro, onions leeks and potatoes.

Starts:
Broccoli, cabbage, cauliflower, celery, greens of all sorts and onions.
It can be possible to put out tomatoes, and peppers now but they will need serious cover!!!

More veggie tips
Continue to harden off veggies to go outside. A cold frame or unheated porch will do the trick but if you rush this process and don’t allow plants to transition you can stunt them. We feel that it is better to avoid starting melons and beans inside as they don’t often transplant well.

Water
Think about installing a watering system now before the heat of summer, it will save you time and money while conserving a precious resource. And in the mean time remember to frequently check the moisture on new outdoor seedlings and transplants to make sure they don’t dry out I can sometimes just take a day for a new plant to wither.

Plant plant plant! Now is such a great time of year to make additions to your garden and there are so many lovelies to choose from – come visit us and see!

SLUGS!

Slugs – We all got em! Now what do we do with them.

slug AM

Slugs are sort of amazing really, most feed on leaf litter or rotting material and work to keep an ecosystem tidy and free of too much bacteria that might build up in decomposing matter. Unfortunately in our urban gardens there are very few natural predators to keep slug populations in check and the leaves they prefer are our tender young plants. While a few slugs will do a bit of damage too many slugs can devastate our veggie gardens and perennials.

If slugs are becoming a problem in your garden here are a few tips to keep them under control.

Hand pick them – I once told this to a man seeking advise and he looked at me like I was insane “with your hands?” he said turning green with disgust. But Northwest gardeners are a hardy bunch and if that is what it takes to protect your lettuce you can find the courage to do it. My grandmother Lucille gives this advise –  “Slugs love to hide under the rain downspouts, under rocks, between bricks or even the underside of large leaves” She also looks for them “near their favorite foods like hostas or salomons seal”. Slugs are nocturnal so the best time to find them is in the evening. Slugs prefer moist areas which is another reason to water the garden in the morning instead of the evening. Evening watering creates the perfect environment for them to come out and feed.

Dispose of the them – you can put them in a jar and release them far from your garden if you are feeling generous but most people just plop them in saltwater or squish them. Some people feed them to their chickens as a treat while others think it gives their eggs an “off” taste.

Bait them – If you are having a hard time finding them in the first place you can lure them into a trap by placing something enticing out for them to find and then collecting them up. Try a half citrus peel in the garden and the next morning they will be lurking underneath so you can collect them. They are also drawn to food scraps.

Trap them – You can also use traps filled with beer or cornmeal. You can purchase little traps or cut a hole in a used yogurt container. Leave enough room at the bottom to fill with the bait and cover the top with the lid to keep rain from diluting, plus with a lid you don’t need to see the resulting slug slurry. Dispose in the compost.

Natural predators – Nematodes can be purchased in little packets and watered into the surface of the soil. These parasites attack the slugs and can be effective but keep in mind that slugs are a part of the garden system. I have hear stories of people wiping out slug populations only to find them rebound with destructive force the following season.

Poison – This is a last resort please use caution as some poisons will linger in the slug and can harm birds that feed on them. Pet safe sluggo is the best option but read the labels carefully and use caution where wild animals or pets are present.

Preventative action – look for slug eggs and dispose of them. Slug eggs are a gooey little cluster of round white balls, they can be found just under the surface of the soil or stuck under leaf litter or protected under rocks, bricks or decks.

One last tip – vinegar will to help remove the impossible slime from your hands and tools.

Making the most of your vegetable garden!

garden overloadThere are several ways to make the absolute most of your vegetable garden plot. Succession planting will give you a much longer season of harvest and inter-planting will help maximize space and make room for more plants and less room for weeds and pests.

Succession planting – Cool or short season crops can be planted very early in the Spring, starting in February then rounds of successive plantings continue on into the Fall for continual harvests. During mild winters here in Portland we can have harvests of vegetables almost year round with just a little consideration of planting times.

The first step in developing a succession garden is to make a list of which vegetable you want to grow. Seed packets, gardening books or local University extension web sites will have information on the best time to plant each crop. Check for the dates to maturity, spacing needs, sun requirements and frost tolerance.

Make a planting schedule with the best dates for each plant. You can simplify the process by breaking it down into Spring, Summer and Fall plantings. Or you can go nuts with weekly additions like fast growing lettuces or radishes.

You can pick up a copy of our free planting guides at thicket for tips on what to plant when. Some examples are:
Early planting – peas, arugula, brussels sprouts, carrots, kale, broccoli, beets, greens, cilantro, onions, leeks.
Midseason planting – beans, corn, peppers, tomatoes, cucumbers, squash, eggplant, melons
Late planting – Beet, broccoli, brussels sprouts, cabbage, cauliflower, celery, chive, collard, endive, kale, shallots, fava, garlic.

Interplanting
Interplanting is a great way to make more room in your garden. The process involves planting crops in the same place at the same time.  Many plants can thrive in much tighter quarters that the seed packet suggests as long as you have an understanding of the plants needs and growth cycle. And pests are usually crop specific so mixing up plant families in the garden can help keep them at bay.

Staggering harvest time is a simple process. You might plant a very quickly growing radish, beet or arugula in front of something like a pepper or tomato which will take much longer to mature. You will harvest the fast crops by the time the slow crops need all that space.

Light requirements vary from plant to plant. Lettuces, spinach and celery need less light so place them behind taller crops like tomatoes, peppers or beans.

Nutrient needs can also vary. You can plan your garden so that heavy feeders are grouped together for easy fertilization. Examples are broccoli, cabbage, cucumbers, eggplant, squash and tomato.

Root depth can also be a consideration. Shallow rooted veggies like greens, alliums and radishes wont compete as much for water and nutrients if planted with deep rooted beans, squash, pumpkins or tomatoes.

Compact plantings of lettuces, greens, onions and beets will produce to many plants in one row but you can thin the plants and eat them as micro greens while you are waiting for the rest to reach maturity.

Happy planning and happy eating!

Friends of Zenger Farm

SpringforZenger_Logo

Spring4Zenger_poster

We couldn’t be more excited to be supporting local nonprofit Zenger Farm during their Spring for Zenger fundraiser this year. Shop at Thicket on March 29th and we will donate a portion of your bill to supporting increased access to good food for all Portlanders. Check out the other great local businesses participating in Spring for Zenger March 29 – 31 by clicking here http://zengerfarm.org/index.php?page=spring-for-zenger

Starting seeds indoors

photoStating seeds can be a little intimidating at first but once you get started it can be a wonderful addiction.
Here are a few tips to get you started:

Timing is everything! After you have chosen the coolest seeds to start indoors be sure to check the dates to maturity, you don’t want your seeds to germinate and grow quickly and then have it be too cold outside to transplant them in the garden. Making a calendar is a great idea – check out these links to seed starting charts http://www.organicgardening.com/learn-and-grow/seed-starting-chart. Farmers almanac 2014 Best Spring dates for seeds http://www.almanac.com/gardening/planting-dates/OR/Portland.

Light is one of the most important elements in starting seeds indoors.  Seedlings that don’t get enough light will be leggy and weak and likely only survive to about 3 inches tall and then shrivel. If you have a good southern facing window you may not need additional lighting but everyone else should consider using a grow light. Light bulbs will fade over time and should be replaced annually for best results.

Temperature is also an important factor, if seeds are too chilly they might not ever emerge let alone thrive. Seed starting heat mats are available commercially and while they can really help the process they are not completely necessary as long as you monitor the temp. Seeds placed right in a window may get to cold from the drafts. Check seed packages for specific temp and light requirements.

Soil is also a big consideration. A seed starting mix is best as it will be a very light composition of peat-lite and will be easy for tender young plants to push through. Seed starting mixes also usually contain a very mellow amount of fertilizer just right for young plants. Regular garden soil isn’t the best option as it will contain lots of organisms and bacteria that could harm tender new plants.

Containers should always be clean and sterilized before use. You can use last seasons plastic pots, pop out trays, flats or even used plastic food containers like yogurt or hummus tubs just be sure to thoroughly clean them before reuse. Poke holes in the bottom for good drainage. Peat pots are an easy way to go as they have a specially formulated seed composite and you can plop the whole thing in the garden when ready to transplant. You can also make paper pots yourself.

Fill container about three quarters full with your soil medium. Leave enough room at the top so water can fill and drain into the soil without running over the sides (this will help you be sure to water each pot evenly) Check the seed package for desired depth.

Water is essential when starting seeds. Make sure the soil in your containers is quite moist all the way to the bottom. Invisible dry pockets can form under the surface of new soil so its easier to pre – mix the soil with water in a bowl before filling containers. You don’t want the soil to be soggy but you also don’t want it to be at all dry. Take a clump up in your hands and lightly squeeze to remove any dripping excess before filling. Check moisture frequently and don’t let them dry out at all, a plastic or glass cover helps keep the moisture in.

Seedlings cannot be allowed to dry out but they are also very sensitive to damping off, a fungal disease which can become a problem if the soil is too wet. Keep your pots moist but never soggy and remove coverings once the seedlings begin to develop. Another thing that can help is to put a very small oscillating fan on the seedlings. This will keep air flow moving around the seeds and also forces the little plants to develop strong stalks but it can also dry them out so watch the water! Misters can supply just the right amount of water to the soil but you don’t want to leave leaves wet and susceptible to fungal disease especially in the evening.

Hardening off is so important! Tender seedlings need time to adjust from perfect indoor to harsh outdoor conditions. Place seedlings in a protected outdoor location. You want to shelter them from winds, hard rains and especially direct sunlight which can burn them. Start out with an hour or so a day and gradually work up to more time each day. A week generally gives them the right amount of time to adjust before being planted directly outdoors.

Fertilizers should be used cautiously in the beginning. You new plants need food to grow but too much can do more harm than good. There are some great seedling fertilizer mixes available just follow the directions and enjoy all those new baby plants for the garden.

March garden tips

Blooming daffs

Blooming daffs


It is time to plant! Frost is still a real threat so you will need to protect some tender plantings and new vegetables but most perennials purchased now will be hardened off and ready to go in the ground just as soon as you are willing to get out into the garden. Spring plantings will have a bit of time to root out and get established before the heat and stress of summer. If your soil is water-logged you can cover it with plastic or wait for a dry spell before digging but otherwise start getting those hardy plants in the ground.

Soil prep
Dig in mulch, cover crops and compost from the previous year (not bark). If you didn’t have a chance to get a layer delivered last Fall now is the time to add a nice rich compost or a little organic fertilizer to encourage all those beautiful plants popping up out of the ground.

Pests
The pests are coming out. Look for Slugs and cutworms they are voracious this time of year especially if you have tender new plantings like lettuce and other greens. (see our previous post of tips to deal with slugs). Aphids can be such a problem in the Summer – get them before they get your garden. Treat plants that were infested last year with dormant spray.

Clean up
A tidy garden can be so satisfying! Cut back grasses but leave at least a few inches so as not to damage the plant. Trim off last years faded growth and clean up accumulated yard debris to reveal all that lovely new growth.
This is a great time to get in and make design changes in the garden before plants get to developed to disturb. Some, like iris and lily clumps get so crowded that they need a bit more legroom to bloom. Divide or thin perennials that are getting to large or transplant those that need a new spot.

Vegetable gardens
Starts:
Plant out hardy greens like arugula, chard, lettuce and salad greens as well as parsley broccoli and cauliflower. Root crops such as onions, potatoes, garlic, and shallots can go out now as well.

Seed outdoors:
It’s not to late for peas but get them planted sooner rather than later or you will miss your window. Radishes, carrots, greens and cilantro can all be seeded outside now.

Seed indoors:
Start warm weather seeds indoors but check dates on seed packets and make a plan accordingly. We generally start our tomatoes, eggplants and peppers now as well as a second round of cole crops.

While you are waiting – get the veggie beds spruced up – repair damaged raised beds and add organic matter to build the soil. Some veggies are heavy feeders so rich healthy soil will make for a productive garden.

Indoors
Take cuttings of geraniums, fuchsias or any interesting tender plants you want to use to fill baskets and containers for the summer patio.

Adding Winter interest

Now is a great time to think about areas in our gardens that have been lacking interest and what additions we can make for year round beauty. Evergreens are a great option however there are so many plants that may loose their leaves in winter but still shine because of interesting bark, winter berries or because their trucks and branches form beautiful shapes that are only revealed after the leaves have fallen away.

daphne

Here are some of our favorite plants for Winter interest:

Trees
Magnolia (many varieties) – early bloomer
Catalpa bignonioides – interesting seed pods
Quercus garryana (Garry oak) – growing pattern of branches
Corylus avellana – growing pattern and bark
Daphne – (many varieties)evergreen and scented flowers
Cryptomeria japonica – interesting evergreen foliage
Acer griseum (paperbark maple) – interesting bark
Acer palmatium (coral bark maple) – interesting bark
Japanese maples of all sorts add winter interest for their interesting trunk formations.
Hamamelis (witch hazel) – early spring catkins
Stachyurus praecox (spiketail) – beautiful from and winter blooms
Camelia – many evergreen varieties that bloom in winter and early spring
Betula utilis Jacquemontii (Himalaya birch) – winter bark and growth pattern
Acer tegementosum (Snake Bark Maple) – bark
Pyracantha (Fire Thorn) – evergreen & berries
Sorbus (Mountain Ash) – berries
Magnolia laevifolia – many evergreen varieties

Shrubs and mid sized perennials
Helleborus (many varieties) – winter blooms and evergreen foliage
Cornus sanguinia – branch color
Salix species (willow) – growth formation
Chimonanthus praecox (wintersweet) – winter bloomer
Chaenomeles – early bloomers
Mahonia – evergreen
Heuchera – evergreen and early bloomer
Huecherella – evergreen and early bloomer
Chamaecyparis pisifera ‘Filifera Aurea’ (Gold Thread Cypress) – evergreen
Viburnum bodnatense ‘Pink Dawn’ – bloomer
Tasmannia lanceolata (Pepper bush) – foliage
Arctostaphylos bakeri ‘Louis Edmunds’ – bark

Vines
Clematis cirrhosa – blooms
Acinidia (kiwi) – growing pattern

Groundcovers
Viola – blooms
Succulents – many varieties
Arctostaphylos uva ursi (Kinnikinnick) – evergreen
Gaultheria procumbens (Wintergreen) – evergreen

Bulbs
Cyclamen coun (winter cyclamen) – winter blooms
Galanthus elwesii (snowdrop) – early Spring blooms
Leucojum vernum – early Spring blooms
Anemone blana and cultivars – early blooms
Narcissus – many varieties – blooms
Crocus many varieties – blooms

Grasses
Calamagrostis X acutiflora – year round interest
Carex (sedge – many varieties) – evergreen
Miscanthus sinensis (and varieties)  – year round interest